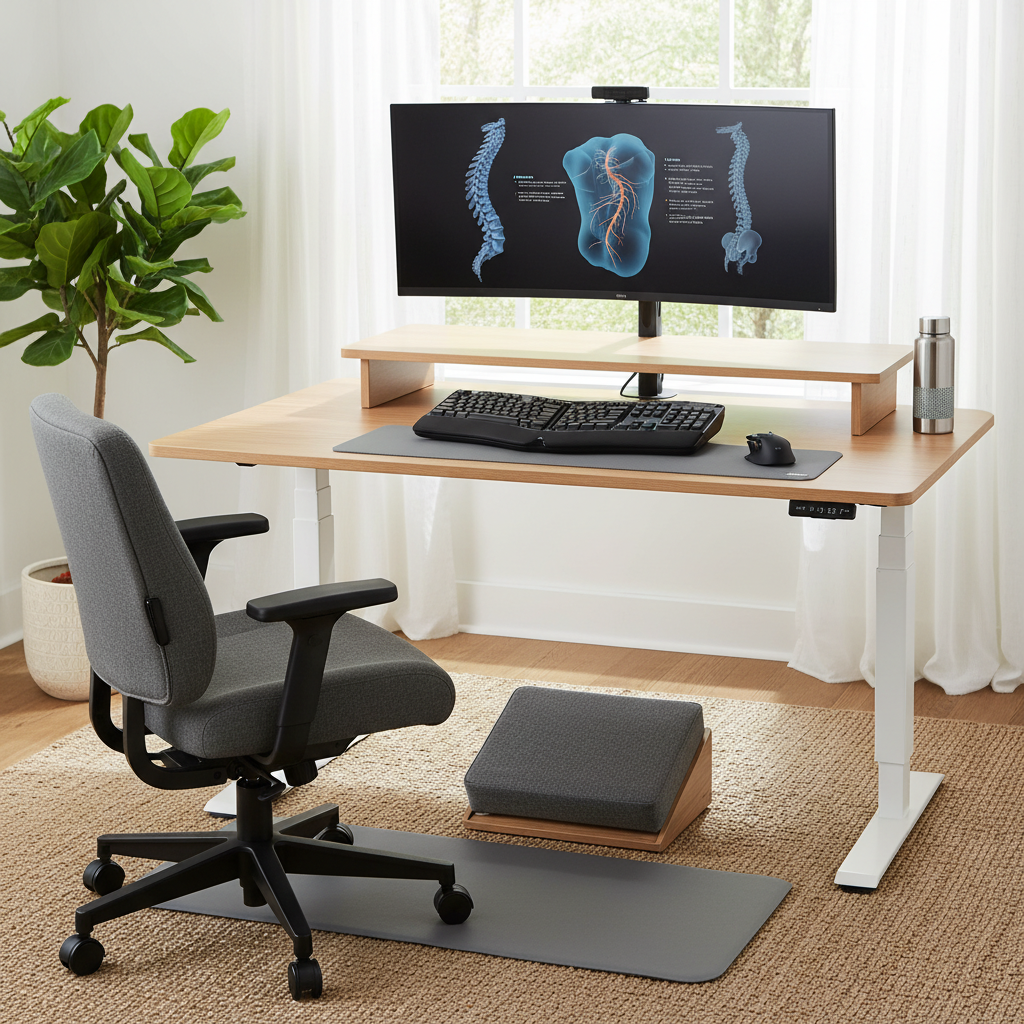
The ergonomic desk setup for sciatica prevention is about aligning your workspace with your body’s needs. A well-designed setup reduces nerve irritation and supports a healthy spine during long workdays. This article provides practical, evidence-based guidance to help you prevent sciatic pain while staying productive.
Understanding sciatica and the role of ergonomics
What is sciatica?
Sciatica refers to pain that travels along the path of the sciatic nerve, typically starting in the lower back or buttock and radiating down the leg. It is often caused or worsened by nerve compression, inflammation, or irritation from a poor posture or repetitive strain. While exercises and medical treatments are part of management, preventing aggravating postures at the desk is a key preventive strategy.
Why desk ergonomics matter for prevention
Prolonged static sitting, poor monitor positioning, and an unsupported lumbar spine can increase stress on the lower back and sacroiliac joints. An evidence-based ergonomic approach aims to keep the spine in a neutral alignment, reduce excessive bending or twisting, and encourage micro-movements that support circulation and core stability. Even small changes—like adjusting chair height or monitor level—can meaningfully lower sciatic nerve irritation over time.
Core elements of an ergonomic desk setup for sciatica prevention
Chair design and seating posture
A quality ergonomic chair with adjustable height, backrest, and lumbar support is foundational. Sit with your feet flat on the floor or on a stable footrest, knees bent around 90 degrees, and hips slightly higher than the knees to promote a neutral pelvic tilt. The backrest should support the natural curve of the lower spine, and the lumbar region should remain in contact with the chair at all times to minimize flexion that can aggravate sciatic symptoms.
Desk height and seating arrangement
The desk height should allow your forearms to rest parallel to the floor when typing, with elbows at about 90 to 110 degrees. Your wrists should be straight and not resting on the edge of the desk while you type. If your desk is not adjustable, consider a sit-stand converter or a height-adjustable desk to alternate between sitting and standing without compromising posture.
Monitor position and visual alignment
Position the monitor so the top of the screen is at or slightly below eye level and about an arm’s length away. This reduces neck flexion and keeps the head aligned with the spine. If you use dual monitors, place the primary screen directly in front of you and angle secondary screens to minimize head turning. A glare-free setup improves concentration and reduces tension that can translate into the back and hips.
Keyboard, mouse, and arm support
Place the keyboard and mouse close enough to avoid reaching, with the keyboard directly in front to keep shoulders relaxed. The wrists should stay straight while typing; consider an ergonomic keyboard or a forearm support if you experience wrist or forearm strain. When possible, use a split or tented keyboard to promote a natural hand position and reduce forearm twisting that can ripple up the kinetic chain to the lower back.
Movement, breaks, and dynamic sitting
Prolonged static posture is a risk factor for sciatic discomfort. Incorporate short movement breaks every 30 to 60 minutes, and integrate gentle stretches targeting the lower back, hamstrings, and hip flexors. If standing options are available, alternate between sitting and standing to reduce cumulative loading on the spine. Even small shifts—seated pelvic tilts, ankle circles, or chair swivels—support circulation and posture.
Foot support, leg circulation, and overall comfort
A stable footrest can help maintain proper knee and hip angles when chair height is not perfectly aligned with your desk. Elevating the feet slightly can relieve pressure on the lower back and sacroiliac joints, supporting better blood flow. Ensure your legs are uncrossed and not pressed tightly against the chair—this helps avoid nerve entrapment that can contribute to sciatic symptoms.
Light, organization, and workspace ergonomics
A clean, well-lit workspace reduces cognitive and physical strain. Proper cable management prevents accidental tugs or sudden posture changes. Adequate lighting minimizes head tilts or squinting, indirectly supporting better neck and spine alignment. An organized desk helps you maintain a neutral posture with fewer micro-adjustments that could irritate the sciatic nerve.
Putting it into practice: a simple at-a-glance setup checklist
- Chair height: adjust so feet are flat, knees ~90 degrees, and hips slightly above knees.
- Lumbar support: adjust to fill the small of the back; maintain a natural spinal curve.
- Desk height: align keyboard and forearms; maintain relaxed shoulders.
- Monitor: top line of sight at eye level; about an arm’s length away.
- Keyboard and mouse: keep wrists straight and close to the body; avoid reaching.
- Foot support: use a footrest if feet do not comfortably reach the floor.
- Standing option: alternate sitting and standing; take breaks every 30–60 minutes.
- Movement and stretches: incorporate micro-mercises for hips, hamstrings, and lower back.
- Lighting and organization: reduce glare; keep the desk tidy to support good posture.
Common mistakes and how to fix them
- Seating with a slouched back: use lumbar support or a small cushion and adjust your chair to promote an upright but comfortable posture.
- Monitor too low or too high: raise or lower to align with eye level; avoid chin jutting or neck bending.
- Keyboard too high or far away: bring it closer and lower to keep forearms nearly parallel to the floor.
- Crossing legs or ankles: keep both feet flat on the floor or on a footrest to maintain neutral hips and pelvis.
- Prolonged static standing: if you use a standing desk, wear supportive footwear and alternate with sitting periodically.
Personalization and when to seek medical guidance
Not every setup works the same for everyone. Factors such as height, leg length, existing back pain, and prior injuries influence the ideal configuration. If you experience persistent or worsening sciatica symptoms despite ergonomic adjustments, or if you notice numbness, weakness, or loss of bladder or bowel control, seek medical evaluation promptly. An occupational therapist or physical therapist can tailor a plan that combines ergonomics with targeted exercises to address your specific risks.
Evidence-informed approach and practical expectations
Ergonomic principles are supported by guidelines for musculoskeletal health in the workplace. The goal is to sustain a neutral spine, reduce repetitive strain, and promote safe movement patterns. While an optimized desk setup is not a substitute for medical treatment, it is a proven, low-risk strategy to lower the likelihood of sciatic discomfort during work. Pairing setup changes with regular movement, core-strengthening exercises, and posture-awareness can yield meaningful improvements over weeks to months.
Conclusion
Adopting an ergonomic desk setup for sciatica prevention is a practical, proactive way to protect your spine while maintaining productivity. Start with the basics—chair, desk height, monitor position, and a plan for movement—and personalize the arrangement to your body. Small, consistent adjustments can reduce sciatic irritation, improve comfort, and support long-term spinal health.
Create an infographic titled “Ergonomic Desk Setup for Sciatica Prevention.” Include labeled sections: chair with adjustable height and lumbar support; desk height and keyboard/mouse alignment; monitor position at eye level; footrest and knee angle; optional sit-stand desk with movement cues; and tips for frequent micro-movements. Use clean vector-style icons and soft colors, with arrows showing correct posture (neutral spine, hips level) and common mistakes (slouched back, monitor too low). Include brief captions for each element and a small checklist at the bottom.

