Is your current desk setup contributing to sciatic pain? An ergonomic desk setup for sciatica prevention can transform your day at work. This comprehensive guide explains practical adjustments that support a healthy spine, reduce nerve pressure, and keep you productive.
Sciatica is often triggered or worsened by prolonged sitting, awkward postures, and repetitive movements. By aligning your workstation with evidence-based principles, you can minimize mechanical strain on the lower back and legs. The goal is a workspace that supports a neutral spine, comfortable reach, and regular movement without sacrificing efficiency.
What is sciatica and why ergonomics matter
Sciatica refers to pain that radiates along the sciatic nerve, typically from the lower back down through the hip, thigh, and leg. In many adults, nerve irritation arises from mechanical pressure related to posture and seating. While not every case is the same, ergonomic factors—such as chair design, desk height, monitor placement, and repetitive strain—play a central role in symptom development and relief.
An ergonomic approach aims to reduce nerve tension and distribute load more evenly across the spine. Small, well-timed adjustments can improve comfort, protect the lumbar region, and support sustainable workdays. For people with existing sciatica, a tailored desk setup often complements medical treatment, exercises, and activity modification.
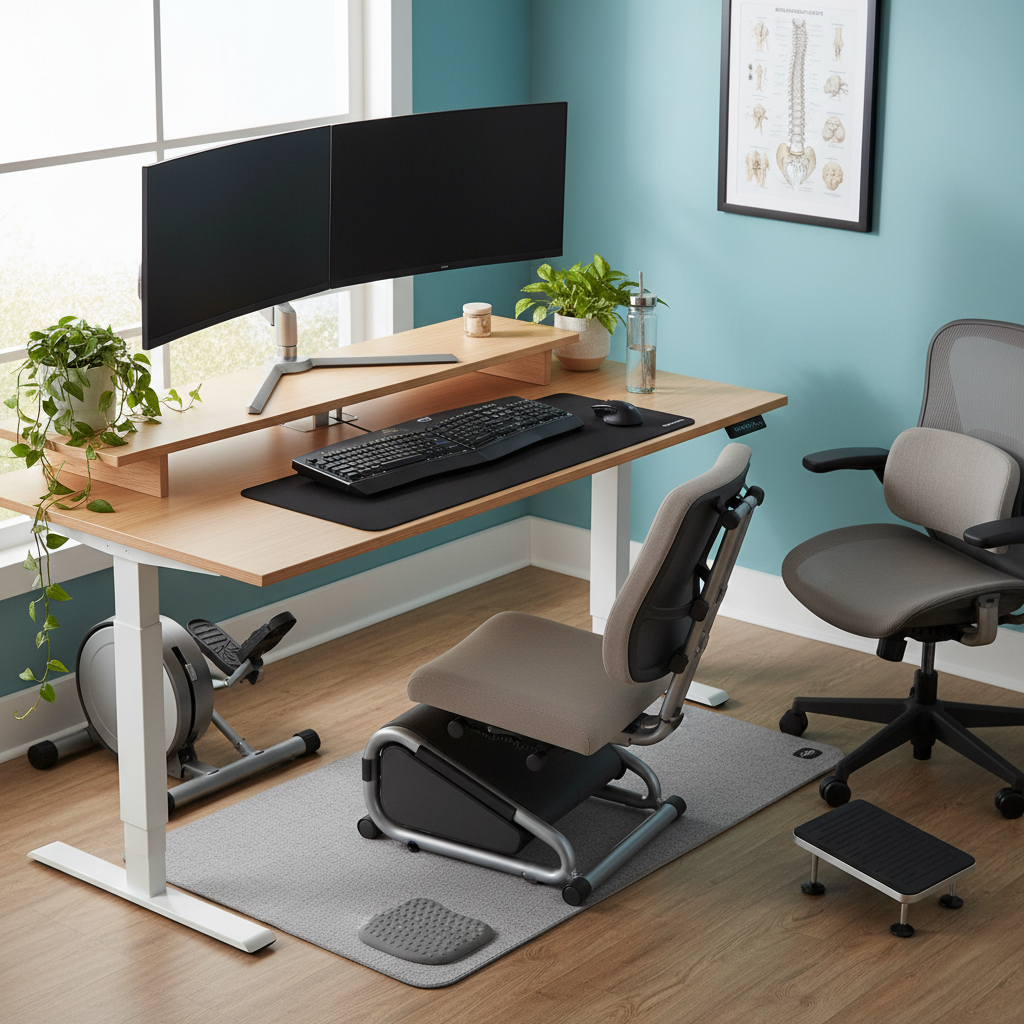
Key elements of an ergonomic desk setup for sciatica prevention
Seating and lumbar support
- Choose a chair with adjustable seat height, depth, and robust lumbar support that matches the natural curve of your lower back.
- Adjust the seat depth so there is about 2–4 inches (5–10 cm) of space between the edge of the chair and the back of your knees.
- Keep feet flat on the floor or use a footrest to maintain a 90-degree knee angle and avoid propping legs under the chair.
- Ensure hips are roughly level with or slightly higher than the knees to promote a neutral spine and comfortable posture.
- Armrests should allow your shoulders to rest, with elbows at about 90–120 degrees and forearms supported while typing.
Desk and monitor arrangement
- Desk height should place your forearms parallel to the floor when typing, with wrists in a neutral position.
- Position the monitor so the top of the screen is at or just below eye level, about an arm’s length away to reduce neck strain.
- Keep frequently used items within easy reach to minimize twisting or leaning to one side.
- Use a sit-stand desk option if possible, allowing gradual variation between sitting and standing throughout the day.
Keyboard, mouse, and arm positioning
- Maintain a straight forearm alignment, with wrists in a neutral posture during typing and mouse use.
- Use a keyboard tray or slight negative tilt only if it reduces strain; avoid excessive wrist extension.
- Place the mouse close to the keyboard to prevent reaching and rotate the arm slightly inward to reduce shoulder tension.
- Keep the elbows near the body to support shoulder comfort and reduce upper back strain.
Standing desk and movement
- Consider a sit-stand setup to break up long hours of sitting; aim for several short sessions rather than a single long stand.
- Use an anti-fatigue mat if standing for extended periods, and ensure the desk height supports a neutral spine in standing position.
- Alternate between sitting and standing roughly every 30–60 minutes, adjusting to personal comfort and task demands.
Stretching and microbreaks
- Incorporate microbreaks every 20–30 minutes to change position and gently loosen tight muscles around the hips and lower back.
- Simple routines include hip flexor stretches, seated piriformis stretches, gentle hamstring stretches, and spinal twists performed safely.
- Core-supporting activities such as gentle pelvic tilts, abdominal bracing, and diaphragmatic breathing can reduce load on the lower back.
Practical 4-week implementation plan
Week 1: Assess and adjust your chair and monitor. Ensure seat depth, lumbar support, and elbow height feel comfortable. Verify monitor height and distance.
Week 2: Tidy the desk layout and add a footrest or anti-fatigue mat if needed. Begin a regular microbreak schedule and practice neutral wrist posture.
Week 3: Introduce a sit-stand routine. Set a target to alternate every 30–45 minutes, gradually increasing standing time as tolerated.
Week 4: Start a light stretching routine and reinforce posture cues. Reassess your setup based on comfort, pain levels, and productivity.
Practical tips for long-term comfort and sciatica prevention
Small, consistent adjustments often yield the best results. Prioritize a neutral spine and balanced load distribution rather than chasing a perfect posture. Listen to your body and modify intensity, duration, and sequence of movements as needed. If sciatic symptoms persist or worsen, consult a healthcare professional for a personalized plan that may include targeted physical therapy, medication guidance, or imaging as appropriate.
Author’s note and credibility
This article is informed by clinical experience in occupational health, physiotherapy, and evidence-based workstation ergonomics. It emphasizes practical, person-centered adjustments that align with best-practice recommendations for musculoskeletal health. If you have specific medical concerns or a history of recurrent nerve pain, seek individualized advice from a qualified clinician.
Conclusion
Optimizing your ergonomic desk setup for sciatica prevention is about thoughtful design and purposeful movement. By aligning seating, desk, and monitor positions with your body’s natural curves, you can reduce sciatic nerve strain, improve comfort, and maintain productivity. Start with the essentials—chair support, monitor height, and elbow alignment—then layer in standing options, microbreaks, and gentle stretches for lasting relief.

