Why tight hip flexors cause lower back stiffness
The hip flexors, primarily the iliopsoas (psoas major and iliacus) and rectus femoris, attach to the front of the pelvis and spine. When these muscles are short or overactive, they pull the pelvis forward into an anterior tilt, increasing lumbar lordosis and compressing the lower back structures.
Research and clinical experience link prolonged sitting, repetitive hip flexion, and poor glute activation to both hip flexor shortening and chronic low back stiffness. Addressing the hip flexors can reduce mechanical strain on the lumbar spine and improve functional movement.
Key principles before you start
- Begin gently: acute pain or sharp neurological symptoms require medical evaluation before doing releases.
- Pair release with strengthening: improve glute and core strength to maintain lengthened hip flexors and neutral pelvic position.
- Breath and relax: diaphragmatic breathing helps the psoas relax during release and stretching exercises.
- Progress gradually: start with 1–2 techniques and add more as tolerance improves.
Safe hip flexor release techniques (step-by-step)
1. Supine lacrosse ball psoas release
How it helps: Focused pressure on the psoas can reduce trigger points that refer pain to the lower back. Use a firm lacrosse ball or massage ball to provide localized pressure.
- Position: Lie on your back with knees bent and feet on the floor. Place the ball just lateral to the belly button, slightly below the hip bone.
- Technique: Gently lower your body onto the ball, supporting weight with elbows. Breathe slowly and hold on tender spots for 30–60 seconds or until tension decreases.
- Dosage: 1–2 times per side, 1–2 minutes total per side. Stop if sharp pain or numbness occurs.
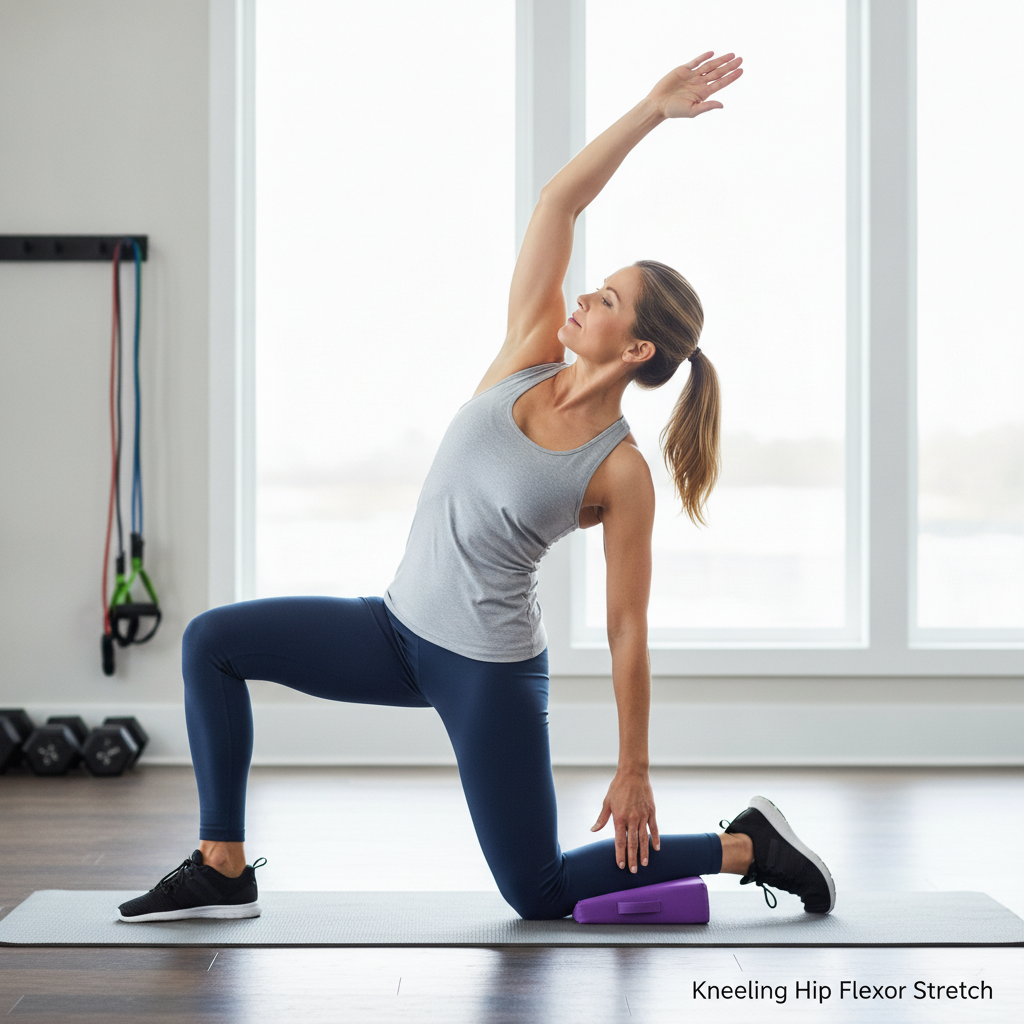
2. Kneeling hip flexor stretch with posterior tilt
How it helps: Stretches the iliopsoas while teaching pelvic control to avoid excessive lumbar extension.
- Position: Kneel with one knee down and the opposite foot forward in a 90/90 split. Tuck your pelvis under with a gentle posterior pelvic tilt.
- Technique: Shift hips forward until you feel a stretch in the front of the hip. Maintain a tall spine and breathe into the lower abdomen for 30–45 seconds.
- Dosage: 2–3 repetitions per side, twice daily.
3. Foam roller anterior hip glide
How it helps: A larger surface area reduces discomfort while mobilizing the anterior hip and soft tissues.
- Position: Lie face down with a foam roller under the front of the hip/thigh. Support your upper body on forearms.
- Technique: Gently roll the hip area in small controlled movements for 60–90 seconds, focusing on tender spots. Add light flexion/extension of the hip to increase effectiveness.
- Dosage: 1–3 times daily as tolerated.
4. Active hip flexor release (contract-relax)
How it helps: Uses neuromuscular techniques to reduce guarding and improve range of motion.
- Position: Lying on your back with one knee bent and the other leg extended.
- Technique: Gently press the hip of the extended leg into the floor for 5–6 seconds (light contraction), relax, then immediately move into a deeper stretch for 20–30 seconds. Repeat 3–4 times.
Integrating mobility and strengthening
Release alone is temporary unless paired with strengthening and motor control work. Train the glutes, posterior chain, and deep core to maintain improvements and reduce recurrence of lower back stiffness.
- Glute bridges: 2–3 sets of 10–15 reps focusing on full hip extension and glute activation.
- Dead bug or bird dog: 2–3 sets of 8–12 reps to improve core and lumbar stability.
- Lunge variations: reinforce hip extension and dynamic control, 2–3 sets of 8–12 reps per side.
Sample 10-minute daily routine
Consistency matters. A short daily routine helps retrain tissue length and neuromuscular patterns.
- 1–2 minutes diaphragmatic breathing to relax the psoas.
- 1–2 minutes lacrosse ball release per side.
- 2 x 30–45 second kneeling hip flexor stretch per side.
- 2 sets of 10 glute bridges and 8 bird dogs per side.
- Finish with 1 minute foam roller glide if needed.
Precautions, red flags, and when to see a clinician
Avoid deep releases or aggressive stretching if you have acute injury, recent abdominal surgery, pregnancy without clearance, or known hernia. If you experience radiating leg pain, numbness, weakness, unexplained weight loss, fever, or bowel/bladder changes, seek medical attention promptly.
If self-treatment provides minimal improvement after 4–6 weeks, consult a primary care provider, physical therapist, or orthopedic specialist for a thorough assessment and personalized treatment plan.
Evidence and clinical rationale
Clinical studies and rehabilitation guidelines support multimodal approaches—manual therapy, soft-tissue techniques, stretching, and targeted strengthening—to address muscle imbalance contributing to low back pain. Addressing hip flexor tightness can decrease anterior pelvic tilt and reduce mechanical stress on the lumbar spine.
As a clinician with over 10 years working in musculoskeletal rehabilitation, I recommend starting conservatively, tracking your symptoms, and progressing exercises based on pain-free range and functional goals.
Final tips for long-term relief
- Limit prolonged sitting—stand and move every 30–60 minutes.
- Perform regular mobility and glute activation work, especially if you have a desk job.
- Use diaphragmatic breathing during releases to help the psoas relax.
- Track posture, lift mechanics, and ergonomics to reduce re-tightening of the hip flexors.
When implemented thoughtfully, hip flexor releases for lower back stiffness are a practical, evidence-informed component of a comprehensive plan to reduce pain and restore functional movement. If unsure, consult a licensed physical therapist to tailor techniques to your specific anatomy and condition.