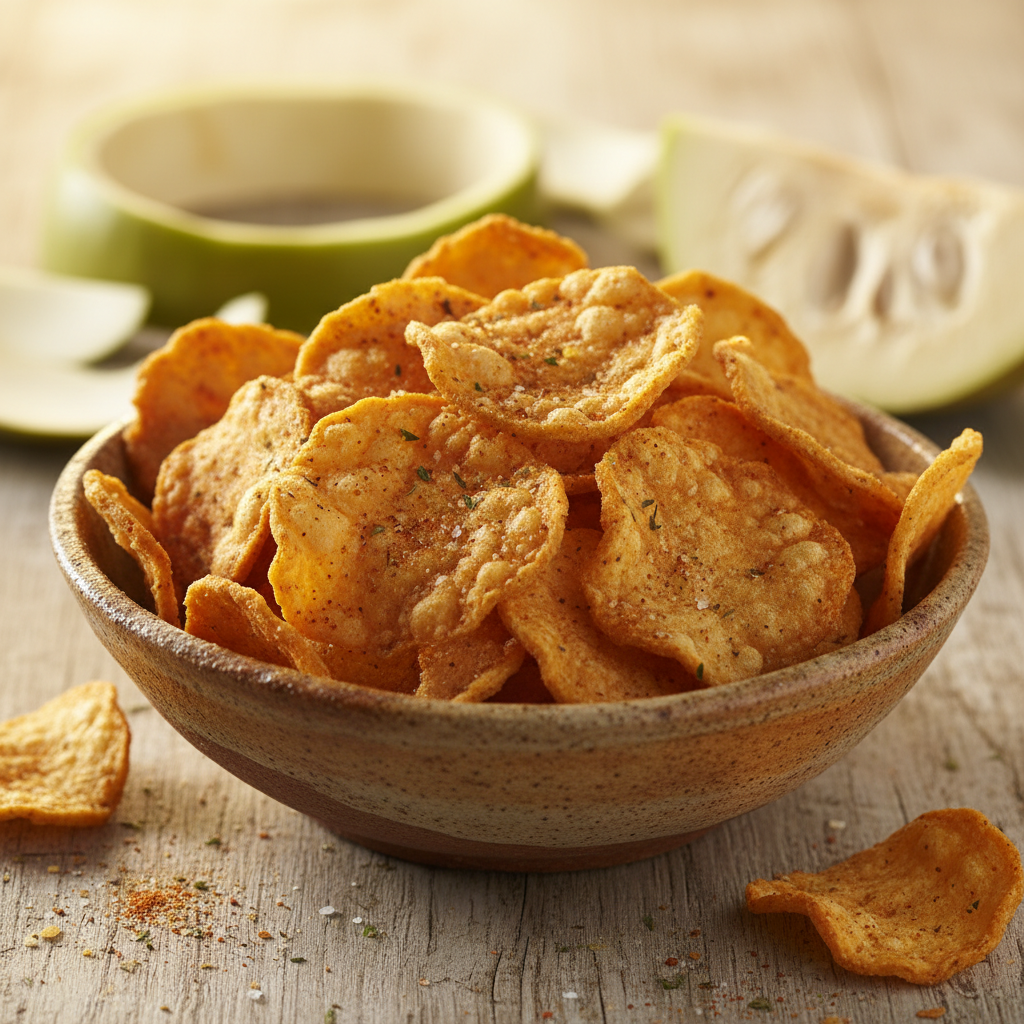
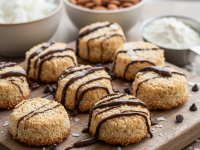
Hey there, fellow food adventurers! If you’re anything like me, you probably love a good snack, especially something crispy, salty, and utterly addictive. And let’s be honest, who doesn’t love chips? But what if I told you that your next favorite batch of crunchy goodness could come from something you usually toss straight into the compost bin? Yes, I’m talking about breadfruit peels!
I know, I know. “Breadfruit peels?” you might be thinking. “Are you serious?” Absolutely! I was skeptical too, the first time someone suggested it. But after years of experimenting in my kitchen, always looking for ways to reduce food waste and discover new flavors, I stumbled upon this revelation. And let me tell you, it’s a game-changer. Not only are these breadfruit peel chips surprisingly delicious, but they’re also a fantastic way to embrace sustainable eating right in your own home. So, grab a cup of coffee (or a fresh breadfruit!), because I’m about to share my tried-and-true secret recipe, along with all the tips and tricks I’ve learned along the way.
My ‘Accidental Discovery’: Why Breadfruit Peel?
My journey into the world of breadfruit peel chips truly began out of curiosity and a stubborn desire to waste less. Living in a region where breadfruit is abundant, I often found myself with a pile of those thick, textured peels after preparing the fruit for a curry or a hearty stew. It always felt a little wrong, just tossing them away. One suy afternoon, while prepping a particularly large breadfruit, a thought sparked: “What if…?”
I remembered how some cultures utilize potato skins, or how certain vegetable trimmings can be repurposed into stock. Why not breadfruit? The texture of the peel, though robust, seemed to hold potential for crispiness. Plus, I’d read about the nutritional benefits of breadfruit itself – it’s packed with fiber, complex carbohydrates, and essential minerals. It stands to reason that some of those good-for-you elements would be present in the peel too. It felt like a culinary challenge I just couldn’t resist. And honestly, the first batch, though a bit rough around the edges, had a unique, earthy flavor that instantly hooked me. It was a revelation! Since then, perfecting this recipe has become a bit of a personal mission, turning what many see as waste into a truly delightful, sustainable snack.
The Simple Magic: What You’ll Need
The beauty of this recipe lies in its simplicity. You don’t need fancy equipment or a list of obscure ingredients. Chances are, you already have most of these in your pantry.
Ingredients:
- Peels from 1 medium-sized breadfruit (firm, ripe but not overly soft)
- 2-3 tablespoons cooking oil (vegetable, coconut, or olive oil works great)
- 1/2 teaspoon salt (or to taste)
- Optional seasonings:
- 1/4 teaspoon black pepper
- 1/2 teaspoon paprika (smoked or sweet)
- 1/4 teaspoon garlic powder
- A pinch of cayee pepper for a kick
- Dried herbs like rosemary or oregano
- Nutritional yeast for a cheesy flavor
Equipment:
- Sharp knife or vegetable peeler
- Cutting board
- Large bowl
- Paper towels or clean kitchen towel
- For cooking (choose one):
- Deep pot or Dutch oven (for deep frying)
- Air fryer
- Baking sheet and parchment paper (for baking)
- Slotted spoon or tongs
- Wire rack (for draining)
Step-by-Step: Turning Trash into Treasure (A Guided Tour)
Alright, let’s get down to business! This is where the magic happens. Follow these steps closely for the best results.
Step 1: Prep Your Peels
First things first, make sure your breadfruit is clean. Give it a good wash. Then, using a sharp knife or a sturdy vegetable peeler, carefully remove the peel. The key here is to get peels that are thick enough to handle without falling apart, but not so thick that they still have a lot of the fruit’s flesh attached. Aim for about 1/8 to 1/4 inch thick. I’ve found that using a sharp knife and carefully slicing off the peel in strips works better than a standard peeler for getting that ideal thickness.
Once peeled, give the peels another rinse under cold water. This helps remove any lingering stickiness or sap. Now, this next part is CRUCIAL for crispiness: thoroughly pat them dry with paper towels or a clean kitchen towel. Any excess moisture will prevent them from becoming perfectly crisp. Seriously, get them as dry as you possibly can!
Step 2: Slice and Dice (The Chip Shape!)
Now that your peels are clean and dry, it’s time to turn them into chip-like pieces. You can either slice them into thin strips, about 1-2 inches long, or cut them into small, irregular chip shapes. I personally love the irregular shapes because they give a more rustic, homemade feel, and each piece has its own unique crunch. The thier you slice them, the crispier they’ll get, so aim for a consistent, thin cut.
Step 3: Seasoning Time!
Transfer your dried, sliced breadfruit peels to a large bowl. Drizzle them with the cooking oil and sprinkle with salt and any other seasonings you choose (paprika, garlic powder, pepper are my go-tos!). Toss everything together really well, making sure each piece is lightly coated with oil and seasoning. Don’t be shy; get your hands in there if you need to, ensuring even distribution. This is where you infuse all that delicious flavor!
Step 4: Choose Your Cooking Adventure!
There are a few ways to achieve that perfect crisp, depending on your preference and equipment. I’ve tried them all, and here’s my take:
A. Deep Frying (My personal favorite for ultimate crunch):
Heat about 2-3 inches of cooking oil in a deep pot or Dutch oven over medium-high heat to around 350-375°F (175-190°C). If you don’t have a thermometer, drop a tiny piece of peel in – it should sizzle vigorously but not burn instantly. Carefully add a single layer of seasoned peels to the hot oil. DO NOT overcrowd the pot; this will drop the oil temperature and lead to soggy chips. Fry for 2-4 minutes, or until golden brown and crispy, stirring occasionally. They will get darker as they cool. Remove with a slotted spoon and place on a wire rack lined with paper towels to drain excess oil. Sprinkle with a little extra salt while they’re still hot!
B. Air Frying (A healthier, less messy option):
Preheat your air fryer to 375°F (190°C). Arrange a single layer of seasoned breadfruit peels in the air fryer basket. Air fry for 10-15 minutes, shaking the basket every 5 minutes, until they are golden brown and crispy. Cooking time can vary depending on your air fryer and the thickness of your peels, so keep an eye on them. Again, work in batches if necessary.
C. Baking (Easiest, but requires patience):
Preheat your oven to 375°F (190°C). Line a baking sheet with parchment paper. Spread the seasoned breadfruit peels in a single layer on the prepared baking sheet. Bake for 20-30 minutes, flipping them halfway through, until they are golden brown and crispy. If they’re not getting crispy enough, you can increase the temperature slightly for the last 5-10 minutes, but watch them closely to prevent burning. Baking often results in a slightly less uniform crisp, but it’s great for hands-off cooking.
Tips for the Perfect Crunch (Learned the Hard Way!)
I’ve made my fair share of soggy, chewy, or even burnt breadfruit peel chips in my quest for perfection. So, learn from my “mistakes” (or, let’s call them valuable learning experiences!):
- Slice Thinly and Evenly: This is arguably the most important tip. Inconsistent thickness means some chips will burn while others remain soft. A mandoline slicer, if you have one, can be your best friend here!
- Dry, Dry, Dry: I can’t stress this enough. Moisture is the enemy of crispiness. Spend that extra minute patting them dry.
- Don’t Overcrowd: Whether you’re frying, air frying, or baking, give your chips space. Overcrowding lowers the temperature and steams the chips instead of making them crisp. Patience, my friend, patience!
- Monitor Temperature: Especially for deep frying. Too low, and your chips will absorb too much oil and become greasy. Too high, and they’ll burn on the outside before crisping up inside.
- Season Immediately: If you’re deep frying, sprinkle with a little extra salt (or your preferred seasoning) as soon as they come out of the oil. The hot oil helps the seasoning adhere beautifully.
- Listen to the Sizzle: When deep frying, the sizzling will become less aggressive as the moisture leaves the chips. That’s a good sign they’re getting close to being done.
Beyond Basic: Flavor Adventures for Your Breadfruit Peel Chips
Once you’ve mastered the basic salt and pepper, the world of flavor is your oyster! Don’t be afraid to experiment. Here are some of my favorite variations:
- Spicy Chili Lime: Add a pinch of cayee pepper or chili flakes to your seasoning mix, and a squeeze of fresh lime juice after they come out of the fryer/oven.
- Garlic Parmesan (if not vegan): Mix in garlic powder, onion powder, and grated Parmesan cheese (or nutritional yeast for a vegan alternative) before cooking.
- Herby Delight: Finely chop fresh rosemary or thyme and toss with the peels and oil. The aroma is incredible!
- Sweet & Savory: A controversial one, but surprisingly good! A tiny pinch of sugar or maple syrup along with the salt and a dash of ciamon creates an intriguing sweet-savory profile.
- Smoked Paprika & Cumin: For a deeper, earthier flavor, especially good if you like a BBQ-esque taste.
Serving Suggestions and Storage
These crispy breadfruit peel chips are best enjoyed fresh, straight off the rack! They make a fantastic standalone snack, a unique appetizer served with a dipping sauce (salsa, guacamole, or a creamy herb dip), or even a creative side dish to sandwiches or soups. I love them with a simple homemade garlic aioli.
If you happen to have any leftovers (which is rare in my house!), store them in an airtight container at room temperature. They tend to lose a bit of their crispness over time, but a quick reheat in an air fryer or oven can often bring some of that crunch back.
Conclusion
So, there you have it – my not-so-secret recipe for crispy, flavorful breadfruit peel chips! It’s a simple, delicious, and incredibly satisfying way to reduce food waste and discover new textures and tastes from a familiar ingredient. Every time I make a batch, I’m reminded of the incredible potential hidden in the parts of food we often overlook. It’s a small step towards more sustainable living, but a giant leap for your snack game!
I genuinely encourage you to give this recipe a try the next time you’re prepping a breadfruit. You might just surprise yourself with how much you love them. And when you do, please share your creations! Tag me or let me know your favorite seasoning combos. Happy snacking, and happy sustainable eating!
