Introduction: The Unsung Hero of Mango Season
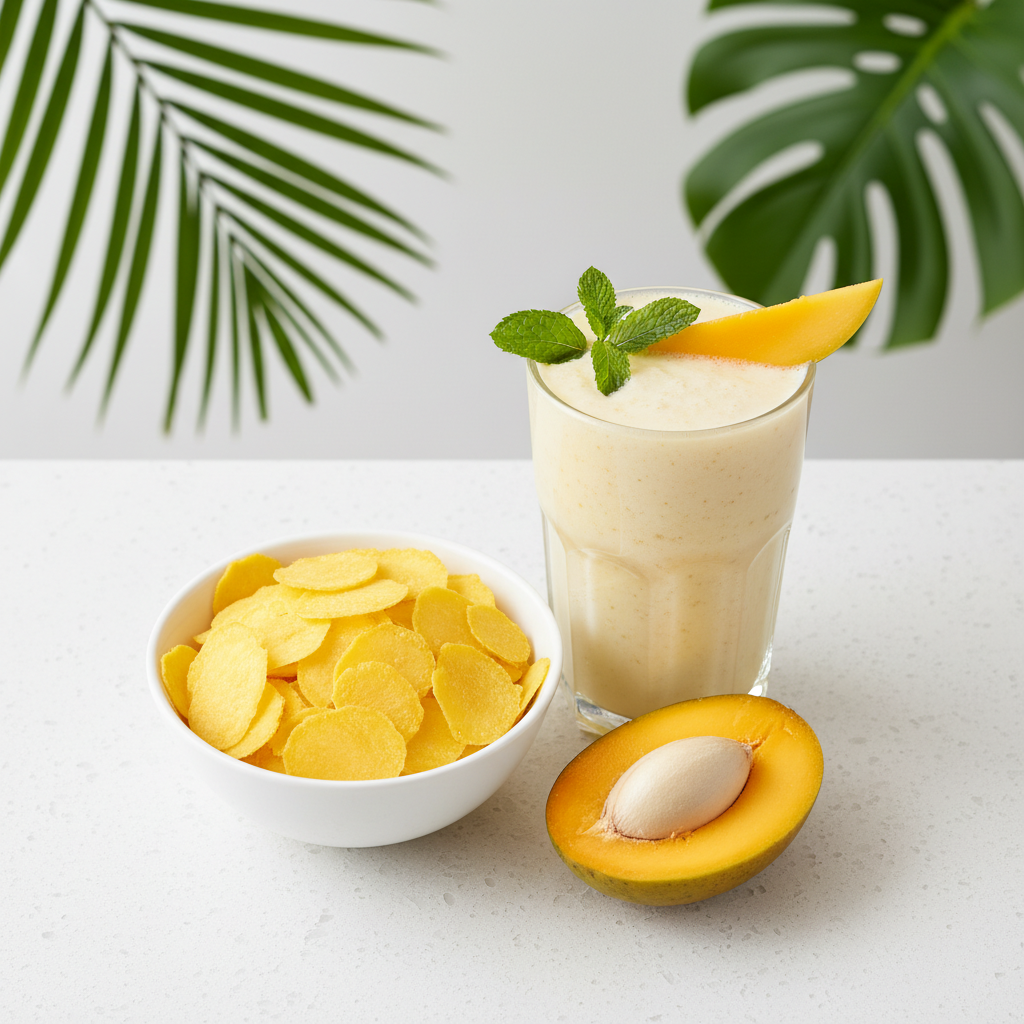
Ah, mango season! Is there anything quite like biting into a juicy, sun-ripened mango? The sweetness, the aroma, the pure tropical bliss. We devour the flesh, maybe gnaw a little around the fibrous pit, and then, almost instinctively, we toss the seed. Right? For years, I did the same. It was just waste, part of the mango experience that had served its purpose. But what if I told you that you’re throwing away a hidden gem, a nutritional powerhouse that, with a little fermentation magic, can transform into an incredible ingredient for a gut-loving smoothie?
My journey into fermented foods started a few years ago when I was really struggling with my digestion. Bloating, discomfort, a general feeling of sluggishness – you name it, I probably experienced it. I dove deep into research, discovering the wonders of probiotics and the ancient art of fermentation. I experimented with sauerkraut, kimchi, kefir, and even fermented garlic. My gut health improved dramatically, and I became obsessed with finding new ways to incorporate beneficial microbes into my diet.
One lazy afternoon, after enjoying a particularly large mango, I found myself staring at the discarded seed. My mind, now attuned to the “waste not, want not” philosophy of fermentation, wondered, “What if…?” A quick search led me down a fascinating rabbit hole: the mango seed kernel. It turns out, this often-ignored part of the mango is packed with nutrients, antioxidants, and fiber. But like many seeds and legumes, it also contains anti-nutrients that can make it harder to digest. That’s where fermentation comes in – it’s a game-changer! From that moment on, my kitchen transformed into a mini-laboratory, and the fermented mango seed smoothie was born. And let me tell you, it’s not just healthy; it’s surprisingly delicious.
In this article, I’m going to share my personal experience, the steps I follow, and my go-to recipe for creating a truly unique and beneficial fermented mango seed smoothie. Get ready to rethink your mango waste!
The Unsung Hero: Why Ferment Mango Seed Kernels?
Before we jump into the “how,” let’s explore the “why.” What exactly is inside that mango seed, and why bother fermenting it?
What’s in a Mango Seed Kernel?
Most people don’t realize that inside the hard, fibrous outer shell of a mango seed lies a creamy, slightly nutty kernel. Think of it like a large, flat almond. From my own research and what I’ve learned, these kernels are surprisingly rich iutrients. They contain:
- Antioxidants: Fighting off those pesky free radicals.
- Fiber: Great for digestion and keeping things moving smoothly.
- Vitamins and Minerals: Including some B vitamins, magnesium, and potassium.
- Healthy Fats: A small amount, but still beneficial.
However, like many seeds, they also contain tains and other anti-nutrients. These compounds can bind to minerals, making them less available for absorption, and can sometimes cause digestive discomfort.
The Magic of Fermentation
This is where fermentation truly shines! In my experience, fermentation isn’t just about creating probiotics; it’s a powerful tool for unlocking the full potential of foods. When you ferment mango seed kernels:
- It breaks down anti-nutrients: The beneficial bacteria get to work, reducing the levels of tains and making the nutrients more bioavailable.
- It creates probiotics: Just like sauerkraut or yogurt, fermented foods introduce beneficial bacteria to your gut, supporting a healthy microbiome.
- It enhances digestibility: The pre-digestion process by microbes makes the kernels much easier on your stomach.
- It transforms flavor: What might be a slightly bitter or bland kernel becomes tangy, complex, and much more interesting.
My “aha!” moment came when I realized I could apply the same principles I used for fermenting vegetables to these overlooked mango kernels. The idea of turning waste into a gut-healing superfood was incredibly exciting!
My First Attempt: Overcoming Skepticism (and a Bit of Mess!)
Let me tell you, my very first attempt wasn’t perfect. I remember staring at the hard mango seed, wondering how on earth I was going to get that kernel out. Some mango varieties have flatter, easier-to-open seeds, while others are thick and fibrous. My first one was definitely on the stubborn side!
I tried a hammer (not recommended indoors!), then a cleaver (even less recommended!). Eventually, I learned the trick:
- Let the seed dry out for a day or two after scraping off all the mango flesh. This makes the outer shell a bit more brittle.
- Carefully, using a sturdy knife and a cutting board, make a shallow cut around the edge of the seed. You’re not trying to cut through it, just score it.
- Then, very carefully, pry it open with the knife tip or a screwdriver.
It took patience, and I definitely mangled a few kernels in the process. But the satisfaction of finally extracting that pale, smooth kernel was immense!
Then came the fermentation itself. I opted for a simple salt brine, much like making lacto-fermented pickles. My initial concern was, “Will it taste weird? Will it go bad?” I remember hovering over the jar for days, sniffing it cautiously. But as I learned, a good ferment smells pleasantly sour, sometimes a bit yeasty, but never truly foul. The first time I tasted a fermented kernel, I was surprised – a delightful tang, a slight hint of mango, and a much softer texture. That’s when I knew I was onto something truly special!
The Art of Fermenting Mango Seed Kernels: A Step-by-Step Guide
Now that you’re convinced, let’s get down to business. This is my tried-and-true method for fermenting mango seed kernels. Remember, cleanliness is key in fermentation!
What You’ll Need:
- Mango Seed Kernels: As many as you can gather (at least 3-5 to start for a decent batch).
- Non-chlorinated Water: Tap water often contains chlorine which can inhibit fermentation. Filtered or distilled water is best.
- Sea Salt (or other non-iodized salt): Essential for creating the brine and promoting beneficial bacteria. I use 2% brine (20g salt per 1 liter water).
- Clean Glass Jar(s): Mason jars work perfectly.
- Lid: A regular caing lid or an airlock lid.
- Optional: A fermentation weight or a small clean bag filled with brine to keep kernels submerged.
My Step-by-Step Fermentation Process:
- Prepare the Kernels: After enjoying your mangoes, scrape off as much fruit flesh and fiber as possible from the seed. Let the seeds dry for a day or two. Then, carefully extract the ier kernel. Discard any kernels that show signs of mold or damage.
- Slice or Chop: I prefer to slice my kernels into thier pieces, about 1/4 inch thick. This increases the surface area for fermentation and makes them easier to blend later.
- Pack the Jar: Place your prepared mango kernel slices into a clean glass jar. Don’t pack too tightly, leave some room at the top.
- Make the Brine: For a 2% brine, dissolve 20 grams of sea salt in 1 liter (about 4 cups) of non-chlorinated water. Stir until fully dissolved. Scale up or down as needed based on your jar size.
- Pour the Brine: Pour the brine over the kernels in the jar, ensuring they are completely submerged. This is crucial to prevent mold growth. Leave about an inch of headspace from the rim of the jar.
- Submerge and Seal: If your kernels float, place a fermentation weight on top, or use a small, clean, brine-filled plastic bag (like a zip-top bag) to keep them under the liquid. Seal the jar with a lid. If using a regular lid, “burp” it daily by loosening it briefly to release built-up gases. If using an airlock, you don’t need to burp.
- Ferment: Place the jar in a cool, dark place away from direct sunlight (room temperature, 65-75°F or 18-24°C, is ideal). The fermentation process usually takes 5-10 days, depending on the temperature.
- Monitor and Taste: You’ll start to see bubbles forming, indicating active fermentation. After about 5 days, you can start tasting a small piece. It should be pleasantly tangy, slightly sour, and a bit softer. It should never smell foul or look moldy (white film on top is usually harmless Kahm yeast, which can be skimmed off, but anything fuzzy or colored should be discarded).
- Store: Once fermented to your liking, move the jar to the refrigerator. This slows down the fermentation process and keeps your kernels fresh for several weeks, if not months.
Crafting Your Fermented Mango Seed Smoothie: My Go-To Recipe
Okay, you’ve successfully fermented your mango seed kernels – congratulations! Now for the fun part: turning them into a delicious and gut-friendly smoothie. This is my favorite combination, but feel free to experiment!
Ingredients:
- 1/4 – 1/2 cup fermented mango seed kernels (sliced)
- 1 ripe banana (fresh or frozen for extra creaminess)
- 1/2 cup fresh or frozen mango chunks (to complement the fermented flavor)
- 1/2 cup unsweetened plant-based milk (almond, oat, or coconut milk work well)
- 1/4 cup water (or more, to adjust consistency)
- 1-2 dates or a drizzle of maple syrup (optional, for extra sweetness, depending on mango ripeness)
- Optional add-ins: 1 scoop collagen powder, 1 tablespoon chia seeds, a handful of spinach, a pinch of turmeric.
Instructions:
- Combine Ingredients: Add all the ingredients (fermented mango seed kernels, banana, mango chunks, plant-based milk, and water) into a high-speed blender.
- Add Sweetener (if desired): If your mangoes aren’t super sweet or you prefer a sweeter smoothie, add the dates or maple syrup now.
- Blend Until Smooth: Blend on high until the smoothie is completely smooth and creamy. If it’s too thick, add a little more water or milk. If you prefer it thicker, use more frozen fruit.
- Adjust and Taste: Give it a taste. You might want to add a bit more sweetness, or perhaps a squeeze of lime juice to brighten the flavors, depending on your preference.
- Serve Immediately: Pour into a glass and enjoy your wonderfully unique and gut-nourishing fermented mango seed smoothie!
Taste and Texture: What to Expect (and Love!)
I know what you might be thinking: “Fermented mango seeds? What does that even taste like?” Trust me, it’s a delightful surprise!
The fermented kernels themselves have a wonderfully tangy, slightly sour flavor, reminiscent of mild sauerkraut or a very subtle pickled vegetable, but with an underlying nutty, subtly mango-y note. The texture, once fermented, is softer and blends beautifully into a creamy smoothie.
When combined with sweet ripe banana and fresh mango, the tang of the fermented kernels creates a perfectly balanced flavor profile. It’s not overly sour; rather, it adds a refreshing zest that prevents the smoothie from being cloyingly sweet. It reminds me a bit of a tropical yogurt drink, but with an even more complex depth of flavor. The banana and mango provide a rich sweetness, while the fermented kernels add that intriguing probiotic “zing.” The texture is wonderfully smooth, especially with a good high-speed blender.
In my personal experience, this smoothie is incredibly satisfying. It feels light yet filling, and I always notice a positive difference in my digestion after enjoying one. It’s a truly unique taste adventure that has become a staple in my breakfast routine.
Beyond the Blender: My Perceived Benefits and Why I Stick With It
For me, making this smoothie isn’t just about the taste; it’s about the holistic benefits I’ve experienced. While I’m certainly not a doctor or a nutritionist, and everyone’s body reacts differently, here’s what I’ve personally noticed since incorporating fermented mango seed kernels into my diet:
- Improved Digestion: This is the big one for me. Fewer instances of bloating, more regular bowel movements, and a general feeling of lightness in my gut. I attribute this directly to the increased probiotic intake and the enhanced digestibility of the kernels.
- Increased Energy: When my gut is happy, I feel more energetic and less sluggish. It’s amazing how much gut health can impact overall well-being.
- Sustainable Living: This is a huge motivator. Instead of discarding a perfectly good part of the fruit, I’m transforming it into something beneficial. It feels good to reduce food waste and be more mindful of resource utilization.
- A Sense of Accomplishment: There’s a deep satisfaction in making your own fermented foods. It coects you to ancient traditions and gives you a sense of control over what you’re putting into your body.
- Flavor Exploration: It’s simply fun to experiment with new flavors and ingredients. This smoothie introduced a whole new dimension to my palate.
This fermented mango seed smoothie has become more than just a recipe; it’s a testament to the power of fermentation and the unexpected treasures hidden in plain sight. It’s a small act of self-care and a step towards a more sustainable lifestyle, all while enjoying a delicious and unique treat.
Conclusion: Your New Fermentation Adventure Awaits!
So, the next time you’re enjoying a juicy mango, pause before tossing that seed. Remember the potential locked within that humble pit. With a little patience and a dash of curiosity, you can transform it into a wonderfully tangy, gut-friendly ingredient for a truly unique smoothie.
From my own kitchen, I can tell you that embarking on this fermented mango seed journey has been incredibly rewarding. It’s challenged my perceptions of food waste, expanded my culinary repertoire, and most importantly, contributed positively to my gut health. It’s a simple act that yields surprising benefits, both for your body and for the planet.
I encourage you to give it a try! Start small, be patient, and don’t be afraid to experiment. You might just discover your next favorite superfood. Who knows, this could be the start of your own exciting fermentation adventure!


