The Secret Ingredient You’re Tossing: Embrace Zero-Waste Cooking with Corn Cob Broth!
There’s nothing quite like biting into a fresh ear of corn, right? That juicy, sweet crunch is a quintessential summer delight. But once you’ve stripped all those golden kernels off, what usually happens to the cob? Into the bin it goes, probably without a second thought. Well, my friend, what if I told you that you’ve been tossing away a secret ingredient, a hidden gem capable of transforming your everyday cooking?
I’m talking about corn cobs, and today, we’re going to turn them into the most incredible, aromatic, zero-waste broth you’ve ever tasted. Seriously! For years, I did the same thing: eat the corn, discard the cob. It wasn’t until a good friend, a seasoned chef with a passion for sustainable cooking, challenged my kitchen habits that I even considered the humble cob’s potential. And oh, what potential it has! This isn’t just about reducing waste (though that’s a huge bonus); it’s about unlocking a subtle sweetness and a deep, comforting flavor that elevates soups, risottos, and so much more. Get ready to rethink your kitchen scraps and embrace this liquid gold!
Why Corn Cob Broth? It’s More Than Just Zero-Waste!
Before we dive into the how-to, let’s talk about the “why.” Why bother making broth from corn cobs when you can just buy a carton of vegetable stock? The answer, my friend, lies in flavor, economics, and environmental consciousness.
First and foremost, the flavor profile of corn cob broth is utterly unique. It carries a delicate, natural sweetness that you simply won’t find in generic vegetable broths. It’s a subtle, earthy, and slightly sweet undertone that enhances dishes without overpowering them. Imagine a creamy corn chowder where the broth itself sings with corn essence, or a risotto that has an unexpected layer of natural sweetness. This isn’t just watery, vaguely savory liquid; it’s a foundation of flavor.
Secondly, let’s talk about your wallet. How many times have you bought a carton of stock, used half, and then forgotten the rest until it’s past its prime? By making your own broth from ingredients you would otherwise discard, you’re essentially getting a high-quality cooking essential for free! It’s an incredibly cost-effective way to add depth to your meals. I personally love the feeling of using every part of my produce; it makes me feel like a truly resourceful cook.
Finally, the zero-waste aspect. In an age where we’re all trying to be more mindful of our environmental impact, turning food scraps into something delicious is a small but mighty step. Think about all the corn cobs that end up in landfills, decomposing and contributing to methane emissions. By giving them a second life, you’re actively reducing food waste and making your kitchen more sustainable. It’s a win-win-win situation!
Gather Your ‘Trash’: What You’ll Need (and Why)
Making corn cob broth is incredibly forgiving and doesn’t require a trip to a specialty store. You likely have most of these ingredients, or their equivalents, already on hand. The beauty of this recipe is its flexibility!
Key Ingredients:
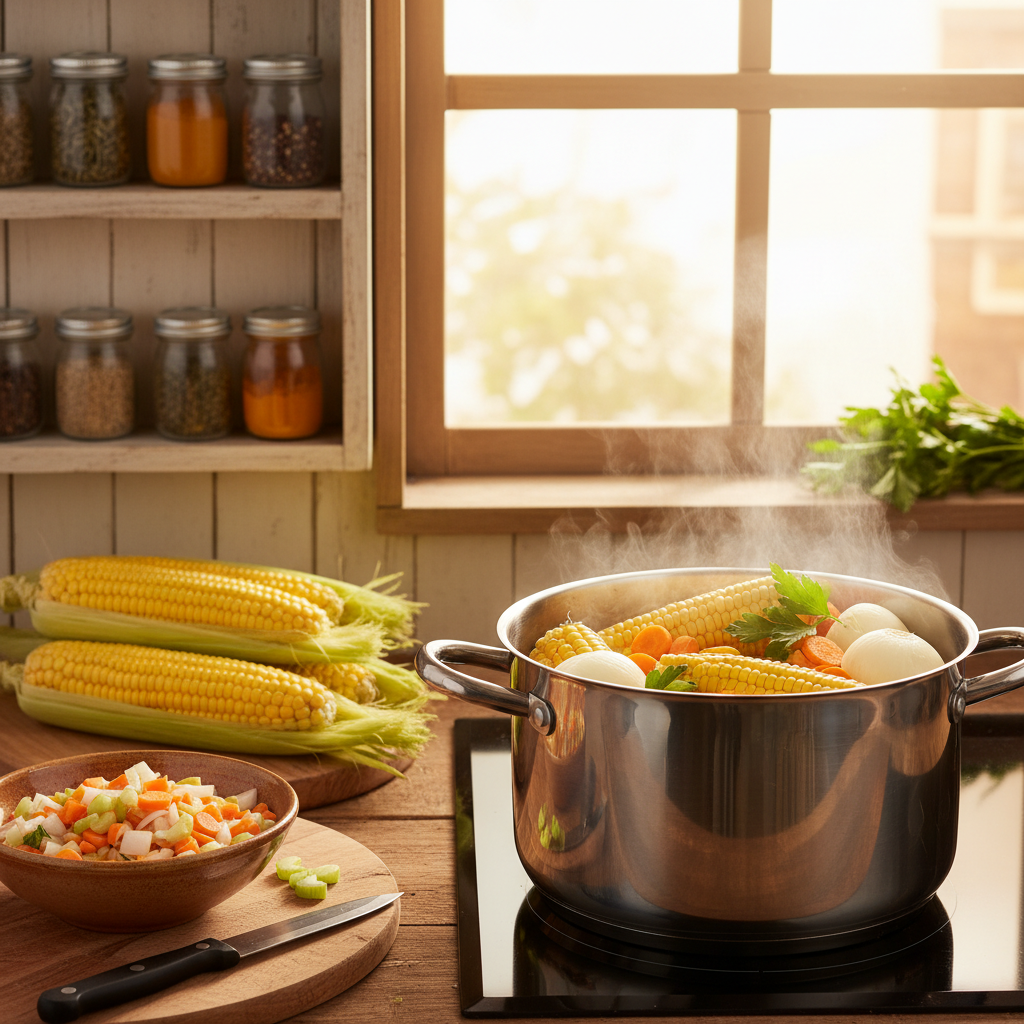
- Corn Cobs: This is our star! Aim for 6-8 cobs for a decent batch of broth. Make sure they are clean, meaning no leftover silk or any signs of spoilage. If you’ve just eaten the corn, they’re perfect. If you’re saving them up, store them in a freezer bag until you have enough.
- Water: About 8-10 cups, enough to generously cover your cobs and aromatics.
- Aromatics: These are your flavor enhancers. Don’t skip them!
- 1 large onion: Quartered. Adds savory depth.
- 2-3 carrots: Roughly chopped. Brings sweetness and earthy notes.
- 2-3 celery stalks: Roughly chopped. Contributes a subtle savory, fresh flavor.
- 4-5 cloves garlic: Smashed (no need to peel!). Adds pungency and warmth.
- Herbs & Spices:
- 1-2 bay leaves: Classic broth ingredient for a subtle, earthy aroma.
- 1 teaspoon whole black peppercorns: Provides a gentle warmth and slight spice.
- A small handful of fresh parsley stems (optional): If you have them lying around, they add a touch of freshness.
- Salt (optional, to taste): I usually add a pinch at the end if I plan to use the broth immediately, but often leave it unsalted if I’m freezing it, allowing me to season the final dish.
Equipment:
- A large stockpot (at least 6-8 quart capacity)
- A fine-mesh sieve or colander
- Cheesecloth (optional, for super clear broth)
- Storage containers (jars, freezer-safe containers)
My Tried-and-True Corn Cob Broth Recipe: Step-by-Step
Now that we have our ingredients, let’s turn those “scraps” into something truly magnificent. This is my go-to method, honed over several batches of trial and error (mostly error iot making enough!).
- Prep Your Cobs: If your cobs are whole, break them into 2-3 pieces. This helps them fit better in the pot and exposes more surface area for flavor extraction. If they’re frozen, no need to thaw them first.
- Sauté the Aromatics (Optional, but Recommended!): In your large stockpot, add a tablespoon of neutral oil (like olive or avocado oil) over medium heat. Add the chopped onion, carrots, celery, and smashed garlic. Sauté for about 5-7 minutes until the vegetables start to soften and become fragrant. This step, which I learned from a pro, deepens the overall flavor of the broth significantly by bringing out their natural sugars.
- Add the Stars: Toss in your broken corn cobs, bay leaves, and black peppercorns. If using parsley stems, add them now too.
- Cover with Water: Pour in enough cold water to generously cover all the ingredients. I usually aim for about 2-3 inches above the solids. Using cold water is key as it allows the flavors to extract slowly and fully as the water heats up.
- Bring to a Simmer: Turn the heat to high until the water just begins to boil. Once it starts boiling, immediately reduce the heat to low, so it maintains a gentle simmer. You’ll see tiny bubbles breaking the surface, but nothing too aggressive.
- Simmer Patiently: Cover the pot partially (leaving a small gap for steam to escape) and let it simmer for at least 60-90 minutes, or even up to 2 hours. The longer it simmers, the more flavor you’ll extract. I usually go for 90 minutes; it’s the sweet spot for maximum flavor without developing any bitter notes.
- Strain Your Liquid Gold: Once you’re happy with the flavor (taste a small spoonful!), remove the pot from the heat. Carefully strain the broth through a fine-mesh sieve into another large bowl or pot, discarding all the solids. If you want an exceptionally clear broth, line your sieve with a layer of cheesecloth.
- Cool and Store: Allow the broth to cool completely before transferring it to airtight containers. This is crucial for food safety! Once cool, you can refrigerate it for up to 4-5 days or freeze it for up to 3-4 months.
Tips & Tricks for the Best Broth Ever (From My Kitchen to Yours)
Having made this broth countless times, I’ve picked up a few nuances that can take your corn cob broth from good to absolutely phenomenal.
- Roast Your Cobs First: For an even deeper, slightly nutty flavor, you can roast your corn cobs in the oven at 400°F (200°C) for 15-20 minutes until lightly browned before adding them to the pot. This caramelization adds another layer of complexity. I especially love doing this if I’m plaing to use the broth for a rich risotto.
- Use Other Veggie Scraps: Don’t limit yourself to just corn cobs and the main aromatics! Save other clean vegetable scraps like leek tops, mushroom stems, potato peels (from organic potatoes), or bell pepper cores. Add them to the pot along with the cobs for an even more complex flavor profile. This is next-level zero-waste!
- Don’t Over-Simmer: While a longer simmer extracts more flavor, there’s a point of diminishing returns. Simmering for too long (e.g., more than 2-3 hours) can sometimes lead to a slightly bitter taste, especially from the corn cobs themselves. Stick to the 90-minute to 2-hour window.
- Adjust Seasoning at the End: Remember, you can always add more salt, but you can’t take it away. I prefer to leave my broths unsalted or lightly salted until I’m ready to use them in a dish. This gives me maximum control over the final seasoning.
- Batch Cook and Freeze: Whenever I make corn cob broth, I make a big batch. I pour cooled broth into ice cube trays for small portions, or into freezer-safe containers for larger quantities. Label and date them! It’s such a time-saver to have homemade stock ready to go.
How to Use Your Liquid Gold: Unlocking Culinary Potential
Now that you have this incredibly flavorful, naturally sweet corn cob broth, what do you do with it? The possibilities are truly endless!
- Soup Base: This is my absolute favorite use. It makes an incredible base for corn chowder (obviously!), but also vegetable noodle soup, a light chicken and vegetable soup, or even a simple miso soup.
- Risotto Liquid: Forget plain water or generic chicken broth. Using corn cob broth for your risotto adds an unbelievable depth of flavor and a touch of sweetness that will impress everyone.
- Cooking Grains: Use it instead of water to cook rice, quinoa, or couscous. It infuses your grains with a delicate corn flavor, making them anything but bland.
- Braising Liquids: If you’re braising chicken, pork, or vegetables, corn cob broth can add a subtle sweetness and body to your braising liquid.
- Sauces: Reduce it down to create a flavorful glaze for roasted vegetables or a base for creamy sauces.
- Drink It! On a chilly day, a warm mug of seasoned corn cob broth is incredibly comforting and surprisingly satisfying.
Embrace the Flavor, Not the Waste!
So, there you have it! The humble corn cob, often relegated to the trash bin, holds a secret culinary power. By transforming it into this sweet, aromatic broth, you’re not only creating a delicious and versatile kitchen staple but also taking a meaningful step towards a more sustainable and resourceful kitchen. I encourage you to give this recipe a try next time you enjoy fresh corn. You might just find, like I did, that some of the best flavors come from the most unexpected places. Happy cooking, and happy zero-wasting!


