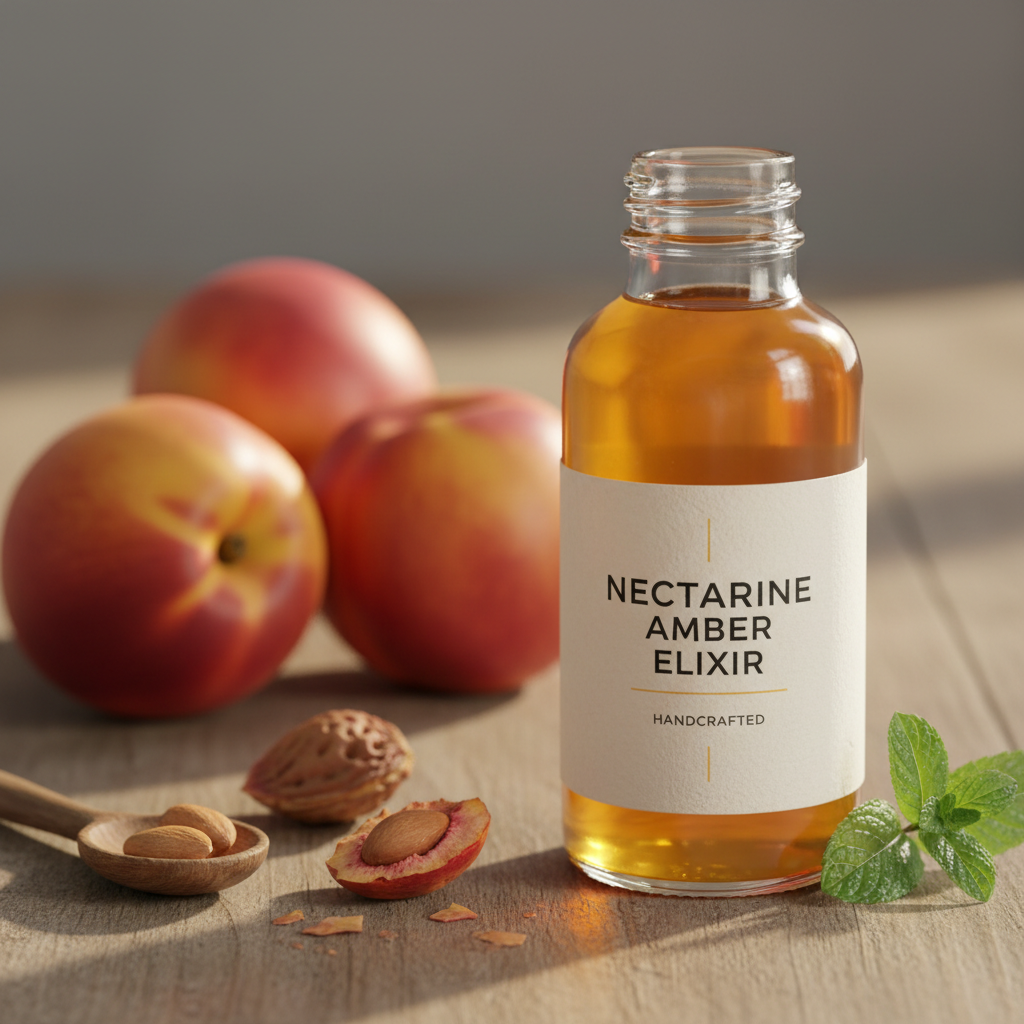
Ever found yourself finishing a delicious, juicy nectarine, and instinctively tossing that big, hard pit into the compost or trash? I used to do it all the time, completely oblivious to the little secret flavor bomb I was discarding. But what if I told you those humble nectarine pits hold a surprisingly delicate, almond-like essence, just waiting to be extracted and transformed into a luscious, aromatic syrup? Trust me, this isn’t just a recipe; it’s a revelation!
My culinary journey has always been about minimizing waste and maximizing flavor. I love the challenge of taking something often overlooked and turning it into something extraordinary. That’s precisely how I stumbled upon the magic of nectarine pit syrup. It’s a simple, elegant way to extend the joy of nectarine season, adding a unique twist to your desserts, drinks, and even savory dishes. If you’re ready to embrace a little kitchen wizardry and impress your taste buds, grab those pits – we’re about to make some liquid gold!
My Journey to Nectarine Pit Syrup: A Flavor Revelation
I distinctly remember the first time I heard about making syrup from fruit pits. My initial reaction was a mix of skepticism and intrigue. “Pits? Really? Are they even safe? And what could they possibly taste like?” But the idea of using every part of the fruit, a true nose-to-tail approach for produce, stuck with me. As a lover of almond extract and the subtle marzipaotes found in cherry pits (which, by the way, are chemically similar to nectarine pits), I decided to dive in.
My first attempt involved carefully cracking opeectarine pits, a slightly challenging but oddly satisfying process. The scent that emerged even before cooking was a faint, sweet almond, like a whisper of something truly special. As the pits simmered gently on the stove, a delicate aroma began to fill my kitchen – not overwhelmingly fruity, but a sophisticated, nutty sweetness with a hint of something floral, reminiscent of amaretto or even a subtle cherry blossom. The resulting syrup was a pale, golden hue, and its taste? Absolutely divine. It was sweet, yes, but with an underlying complexity, a sophisticated almond-vanilla note that was utterly unique. From that day on, no nectarine pit has ever gone to waste in my kitchen!
Why Nectarine Pits? Unveiling Their Secret Flavor
So, what’s the secret behind this unexpected flavor? Like many stone fruits (cherries, peaches, apricots), nectarine pits contain a compound called amygdalin. When broken down, amygdalin can release benzaldehyde, which is the very same compound responsible for that distinctive almond flavor. While raw pits in large quantities can be a concern due to cyanide compounds, the cooking process (simmering in water and sugar) effectively denatures these compounds, making the resulting syrup perfectly safe for consumption in typical quantities. The heat also helps to extract and concentrate that wonderful almond-like essence.
By using the pits, we’re not just creating a delicious ingredient; we’re also practicing a wonderful form of zero-waste cooking. Instead of discarding what many consider trash, we’re transforming it into a valuable, flavorful syrup that adds a gourmet touch to countless dishes. It’s a small step that makes a big impact on reducing food waste and appreciating the full bounty of nature.
Gather Your Tools: What You’ll Need
Making nectarine pit syrup is surprisingly straightforward and doesn’t require any fancy equipment. Here’s what you’ll need:
- Nectarine Pits: Roughly 1-2 cups (from about 8-12 nectarines, depending on size). Make sure they are clean!
- Water: About 4 cups (you might need more or less depending on how many pits you have).
- Granulated Sugar: 1-2 cups (adjust to your sweetness preference).
- Optional Flavor Enhancers: A vanilla bean, a ciamon stick, a few cardamom pods – these can add depth.
Equipment:
- A sturdy cutting board and a heavy object (like a meat tenderizer, a small hammer, or even another heavy pan) for cracking pits.
- A medium-sized saucepan.
- A fine-mesh sieve or cheesecloth.
- Sterilized glass jars or bottles for storage.
The Heart of the Matter: Preparing Your Nectarine Pits
This is arguably the most crucial step for maximizing flavor. Don’t just toss whole pits into the pot – we need to expose that ier kernel!
- Clean Your Pits: After enjoying your nectarines, thoroughly clean any remaining fruit pulp from the pits. A good scrub under ruing water usually does the trick. You want them as clean as possible to avoid any off-flavors from residual fruit. Lay them out to dry a bit.
- Crack ‘Em Open: This is where the fun (and a bit of caution) comes in. Place a pit on a sturdy cutting board. Carefully but firmly strike the pit with a heavy object until it cracks open, revealing the small kernel inside. It’s similar to cracking a nut. Be gentle but firm; you don’t want to smash the kernel, just expose it. This step is essential because the flavor compounds are concentrated within these kernels.
- Collect the Kernels: Carefully extract the small, almond-shaped kernels. Don’t worry if some bits of the shell remain attached; the goal is to get as many kernels as possible. If cracking proves too difficult or messy, you can still make the syrup with whole pits, but the flavor will be less intense and take longer to extract. However, for that truly amazing almond note, cracking is highly recommended.
Simmering to Perfection: The Syrup-Making Process
Once your pits (and kernels!) are ready, the rest is smooth sailing:
- Combine Ingredients: Place your cracked nectarine pits and kernels (or whole pits, if you opted for that) into a medium saucepan. Add 4 cups of water. If you’re using optional flavor enhancers like a vanilla bean or ciamon stick, add them now.
- Bring to a Simmer: Bring the mixture to a gentle boil, then reduce the heat to low. Cover the pot and let it simmer for at least 30-45 minutes, or even up to an hour. The longer it simmers, the more flavor you’ll extract. You’ll notice the liquid starting to take on a faint color and a beautiful aroma filling your kitchen.
- Add Sugar: After the initial simmering, remove the lid. Add your sugar (starting with 1 cup and adding more later if needed). Stir until the sugar is completely dissolved.
- Reduce (Optional): If you prefer a thicker syrup, let it continue to simmer uncovered for another 10-15 minutes, allowing some of the water to evaporate and the syrup to thicken slightly. Keep an eye on it to prevent burning.
- Taste and Adjust: Carefully taste a small amount of the hot syrup (let it cool slightly first!). Adjust sweetness if desired by adding more sugar, or if the flavor isn’t strong enough, you can add a touch of almond extract, but I find the natural flavor is usually sufficient.
Straining and Storing Your Liquid Gold
This is the satisfying moment when you separate your glorious syrup from the spent pits.
- Strain the Syrup: Carefully pour the entire mixture through a fine-mesh sieve into a clean bowl or pitcher. Press down on the pits with the back of a spoon to extract every last drop of flavorful liquid. Discard the spent pits. If you want an exceptionally clear syrup, you can line your sieve with cheesecloth for a second straining.
- Cool Completely: Allow the syrup to cool down to room temperature. This is important for safe storage.
- Bottle and Store: Pour the cooled nectarine pit syrup into sterilized glass jars or bottles. Seal tightly. Store the syrup in the refrigerator, where it will last for 2-3 weeks, sometimes even longer. For extended storage, you can freeze it in small portions.
Beyond Pancakes: Creative Ways to Enjoy Your Nectarine Pit Syrup
Now that you have this incredible, unique syrup, what do you do with it? The possibilities are surprisingly vast!
- Beverages: Stir it into your morning coffee or tea for an almond-nectarine twist. Use it to sweeten lemonade, iced tea, or sparkling water. It’s also fantastic in cocktails, replacing simple syrup in an Old Fashioned or a Whiskey Sour for a subtle fruit-nut complexity.
- Desserts: Drizzle it over pancakes, waffles, or French toast. Spoon it over vanilla ice cream, plain yogurt, or fresh fruit salad. Incorporate it into glazes for cakes or pastries, or use it to sweeten whipped cream. It’s truly exceptional when paired with other stone fruits or berries.
- Savory Applications (Adventurous!): A little drizzle can elevate pan-seared pork chops or chicken, especially when served with other fruit components. It can also make a fascinating addition to salad dressings, offering a unique sweet and nutty note.
Troubleshooting & Tips for Success
- Not Enough Flavor? Ensure you’re cracking the pits! This is key. If you didn’t crack them, try simmering for a longer period (up to 1.5 hours). You can also add a tiny dash of pure almond extract at the end, but the goal is to get natural flavor.
- Syrup Too Thin/Thick? If too thin, simmer uncovered for longer to reduce. If too thick, add a tablespoon or two of hot water until desired consistency is reached.
- Safety Reminder: Always cook fruit pits. Avoid consuming large quantities of raw or uncooked pits. The cooking process is important for safely extracting the desired flavors.
- Variations: Experiment with spices! A bay leaf, a few star anise, or even a sliver of fresh ginger can add another layer of flavor.
- Don’t Rush It: The best flavors come from gentle, slow simmering. Patience is a virtue here!
So, the next time you finish a sweet, juicy nectarine, don’t just toss those pits. See them for what they truly are: tiny capsules of hidden flavor, waiting for you to unlock their potential. This nectarine pit syrup isn’t just a zero-waste triumph; it’s a testament to the idea that sometimes, the most unexpected ingredients yield the most delightful results. Give it a try, and prepare to be utterly charmed by this simple yet sophisticated homemade syrup. Happy cooking!


